Submitting Work-Related Expenses
You can submit your work-related expenses for reimbursement in My Expense. You can add new expense records as either an expense item or an allowance item.
As a staff member, you will typically only need to submit expense items.
Before You Begin
Ensure you have all required supporting documents, such as receipts or invoices.
You will also need to provide the following details for each expense or allowance item:
Currency
Amount
Date
(For travel-related expenses) Travel details:
Origin
Destination
Travel dates
For expense items, you must manually enter the expense name.
For allowance items, you must select the allowance name from a predefined list of allowance pay items. Each allowance item also has a payment type (Gross, Net, or CTC).
Submitting an Expense Record
To submit an expense record:
Go to My Expense.
Select Add New Expense.
(For Expats) Select the Payment Currency.
Select the Record Type (Expense or Allowance).
Enter the expense details.
In Notes, provide any additional details about the expense.
Upload any supporting documents in Expense Files.
Select Submit.
Your expense has been submitted for review.
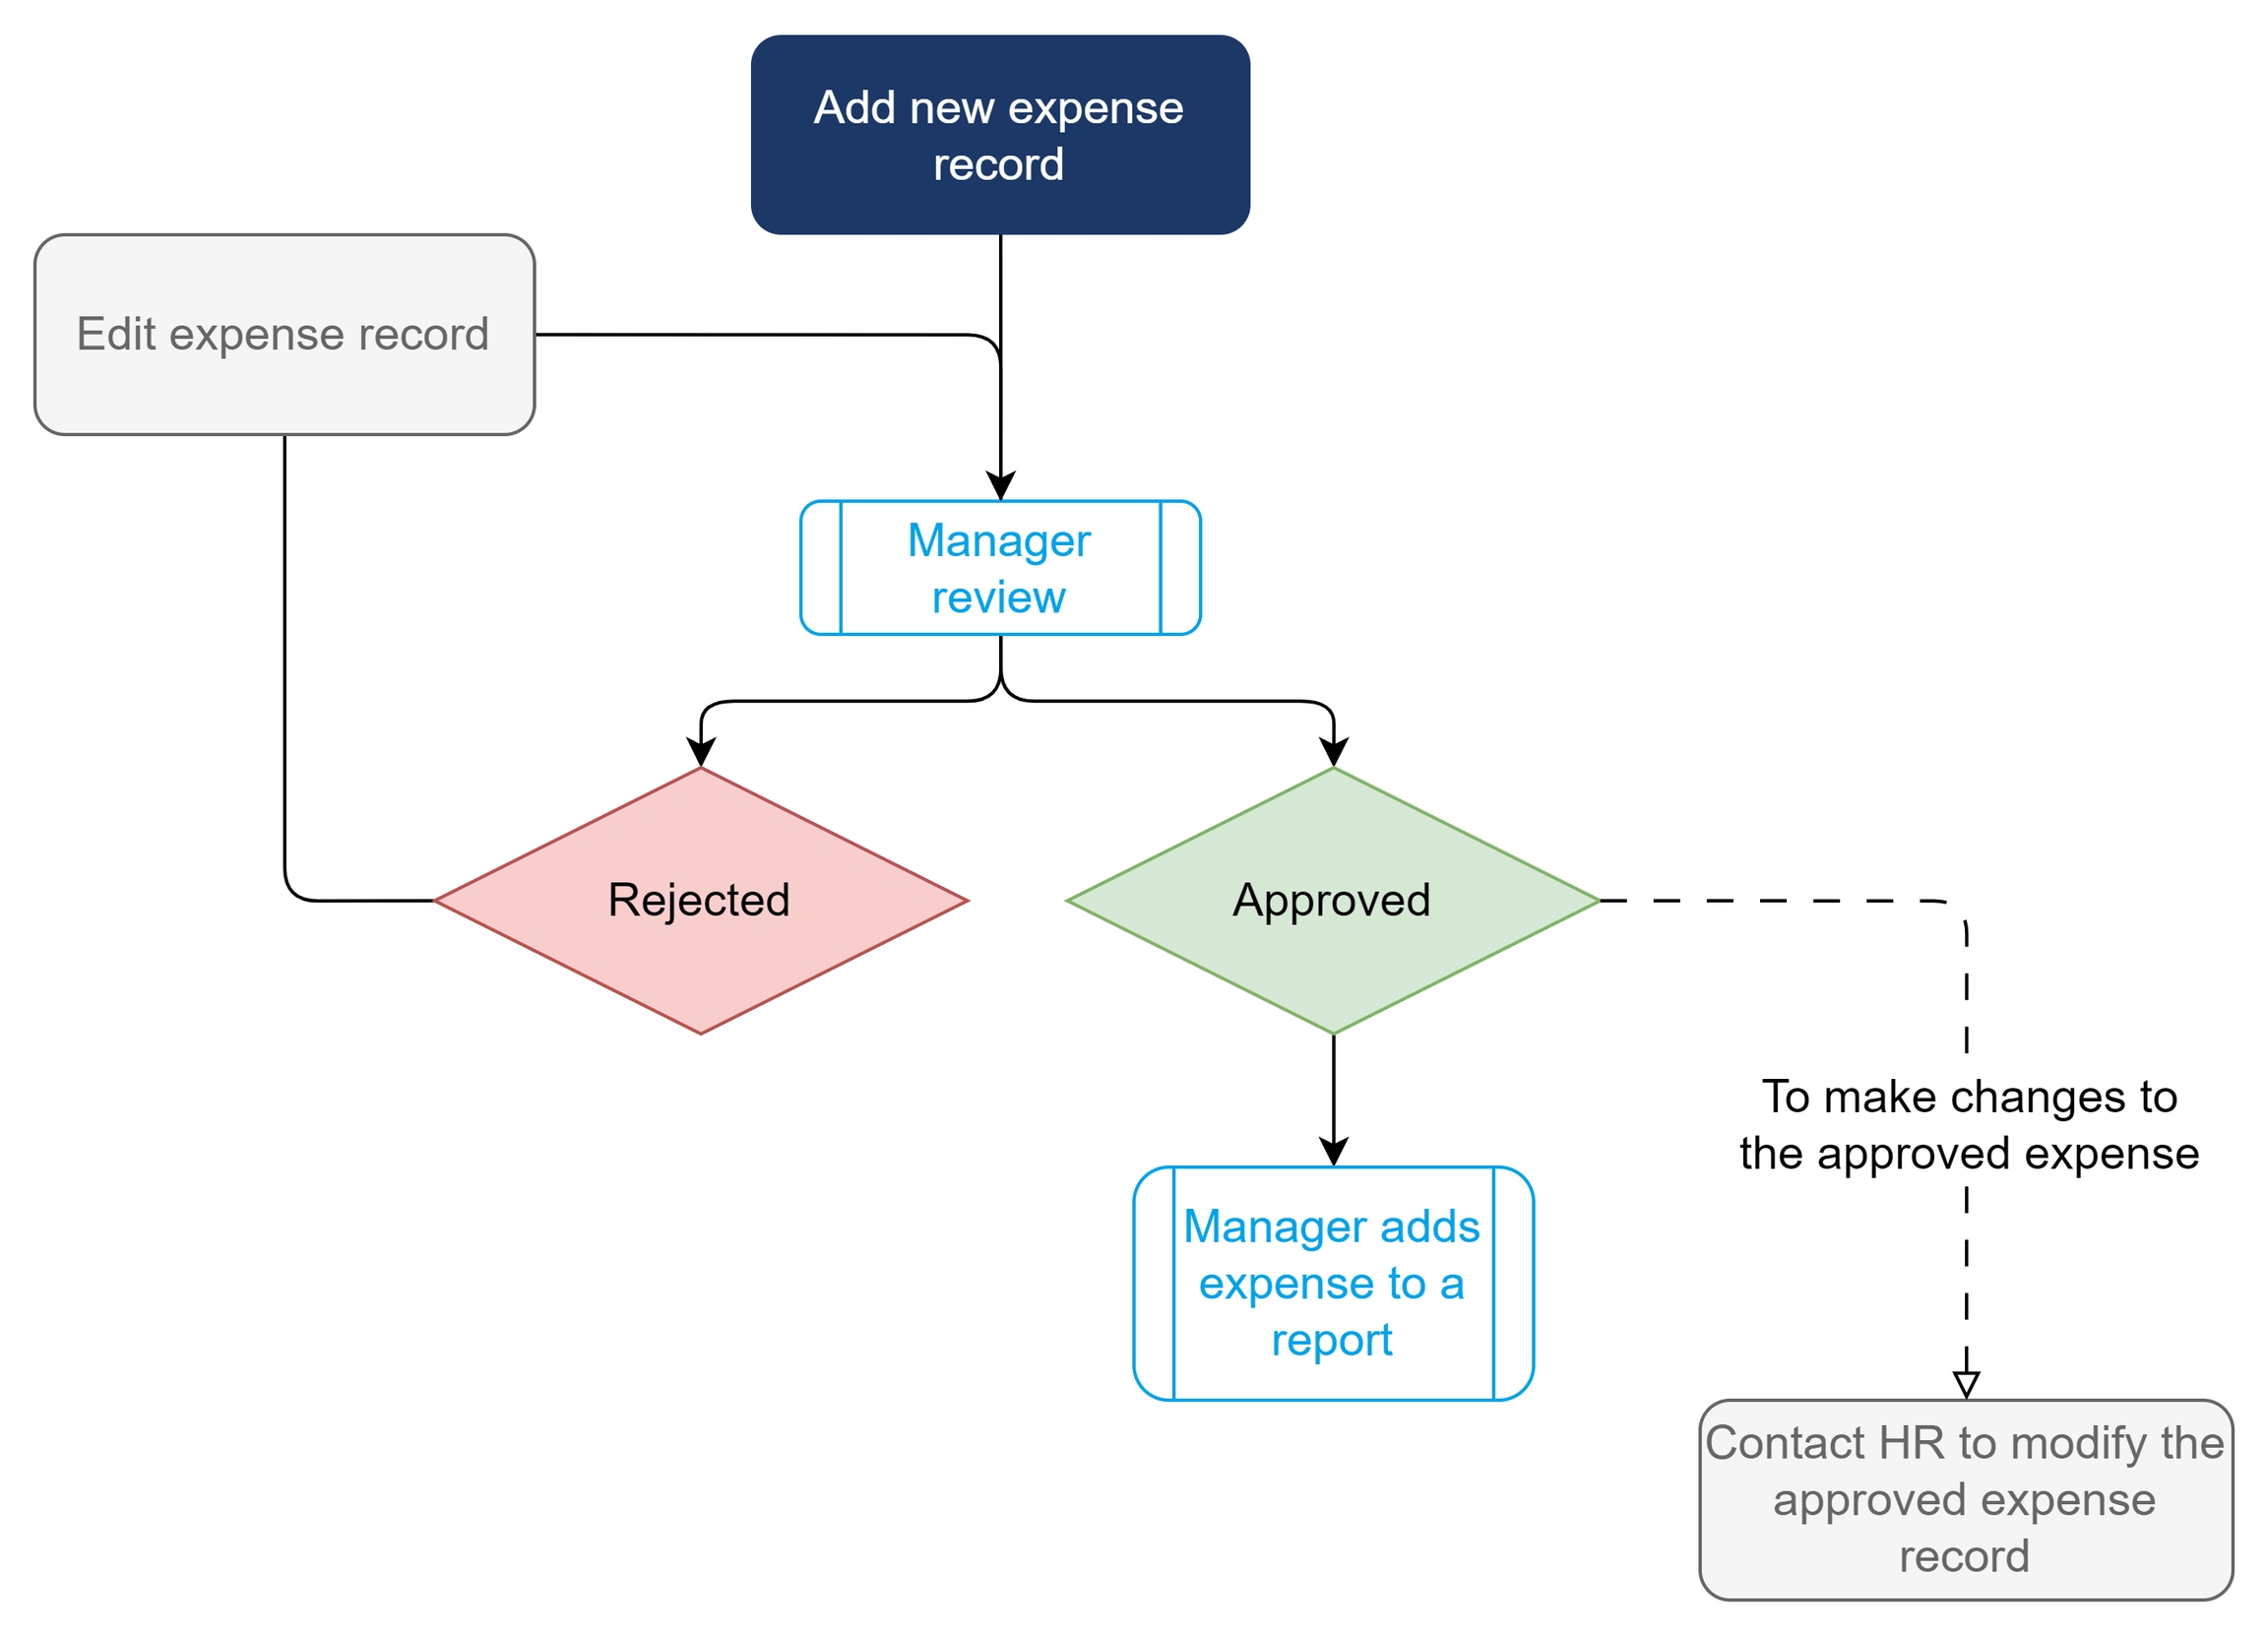
Expense Approval Flow
The expense approval process in Marco follows these steps:
Staff submits an expense record.
Manager reviews and approves the expense record.
Manager adds the approved expense to a payroll or expense report.
Payment is processed according to company policy.
The payment currency is based on the staff member’s designated country. If the staff member is an Expat, they can choose to be paid in their home or host country’s currency.
Expense Review Outcome
Once your expense has been reviewed, you will receive an email notification with the outcome.
You can also check the expense status in My Expense.
If your expense is rejected, you can select the expense to view the rejection notes and edit the expense for resubmission.
For more details on editing expenses, see Editing Expenses.
Changes to Approved Expenses
Once an expense is approved, it cannot be edited or deleted.
If you need to make changes to an approved expense, contact your HR representative or vendor for assistance.
Editing Expenses
You can edit unapproved expenses, including rejected expenses.
To edit an expense:
Go to My Expense.
Under the expense, select ⋮ (three-dot icon) > Edit.
The Edit Expense screen appears.
Update the relevant fields.
Select Submit.
Your expense has been resubmitted for review, and the status of a rejected expense will update to Submitted.
Deleting Expenses
You can only delete unapproved expenses.
⚠ Note: Deleting an expense cannot be undone. However, all deleted expenses can be viewed in Deleted Items.
To delete an expense:
Go to My Expense.
Under the expense, select ⋮ (three-dot icon) > Remove.
Last updated