money-bill-transferMy Expense

You can view all expense records submitted by you or your manager on your behalf in My Expense. Select an expense record to view its details.

Each expense or allowance item contains the following details:

  • Currency

  • Amount

  • Date

  • (For travel-related expenses) Travel details:

    • Origin

    • Destination

    • Travel dates

For expense items, the expense name is entered by the user.


📋 Submitting A New Expense

⚠️ Before You Begin

Ensure you have all required supporting documents, such as receipts or invoices.

You will also need to provide the following details for each expense or allowance item:

  • Currency

  • Amount

  • Date

  • (For travel-related expenses) Travel details:

    • Origin

    • Destination

    • Travel dates


📋 To submit an expense record:

1

Go to My Expense

2

Select Add New Expense

3

Fill in the required information

  • Expense name or type.

  • Expense date

  • Currency and total amount

  • Expense payment type (Company Card or Personal Funds)

  • Request ID

  • Details

  • Expense files such as invoices, receipts, or other supporting documents

4

Select Submit Expense

After submission, your Reporting Manager will receive an email notification and will need to take action to approve or reject the expense.


⏳ Expense Approval Flow

The expense approval process in Marco follows these steps:

  1. Staff submits an expense record.

  2. Manager reviews and approves the expense record.

  3. Manager adds the approved expense to a payroll or expense report.

  4. Payment is processed according to company policy.

The payment currency is based on the staff member’s designated country. If the staff member is an Expat, they can choose to be paid in their home or host country’s currency.

Expense Approval Flow

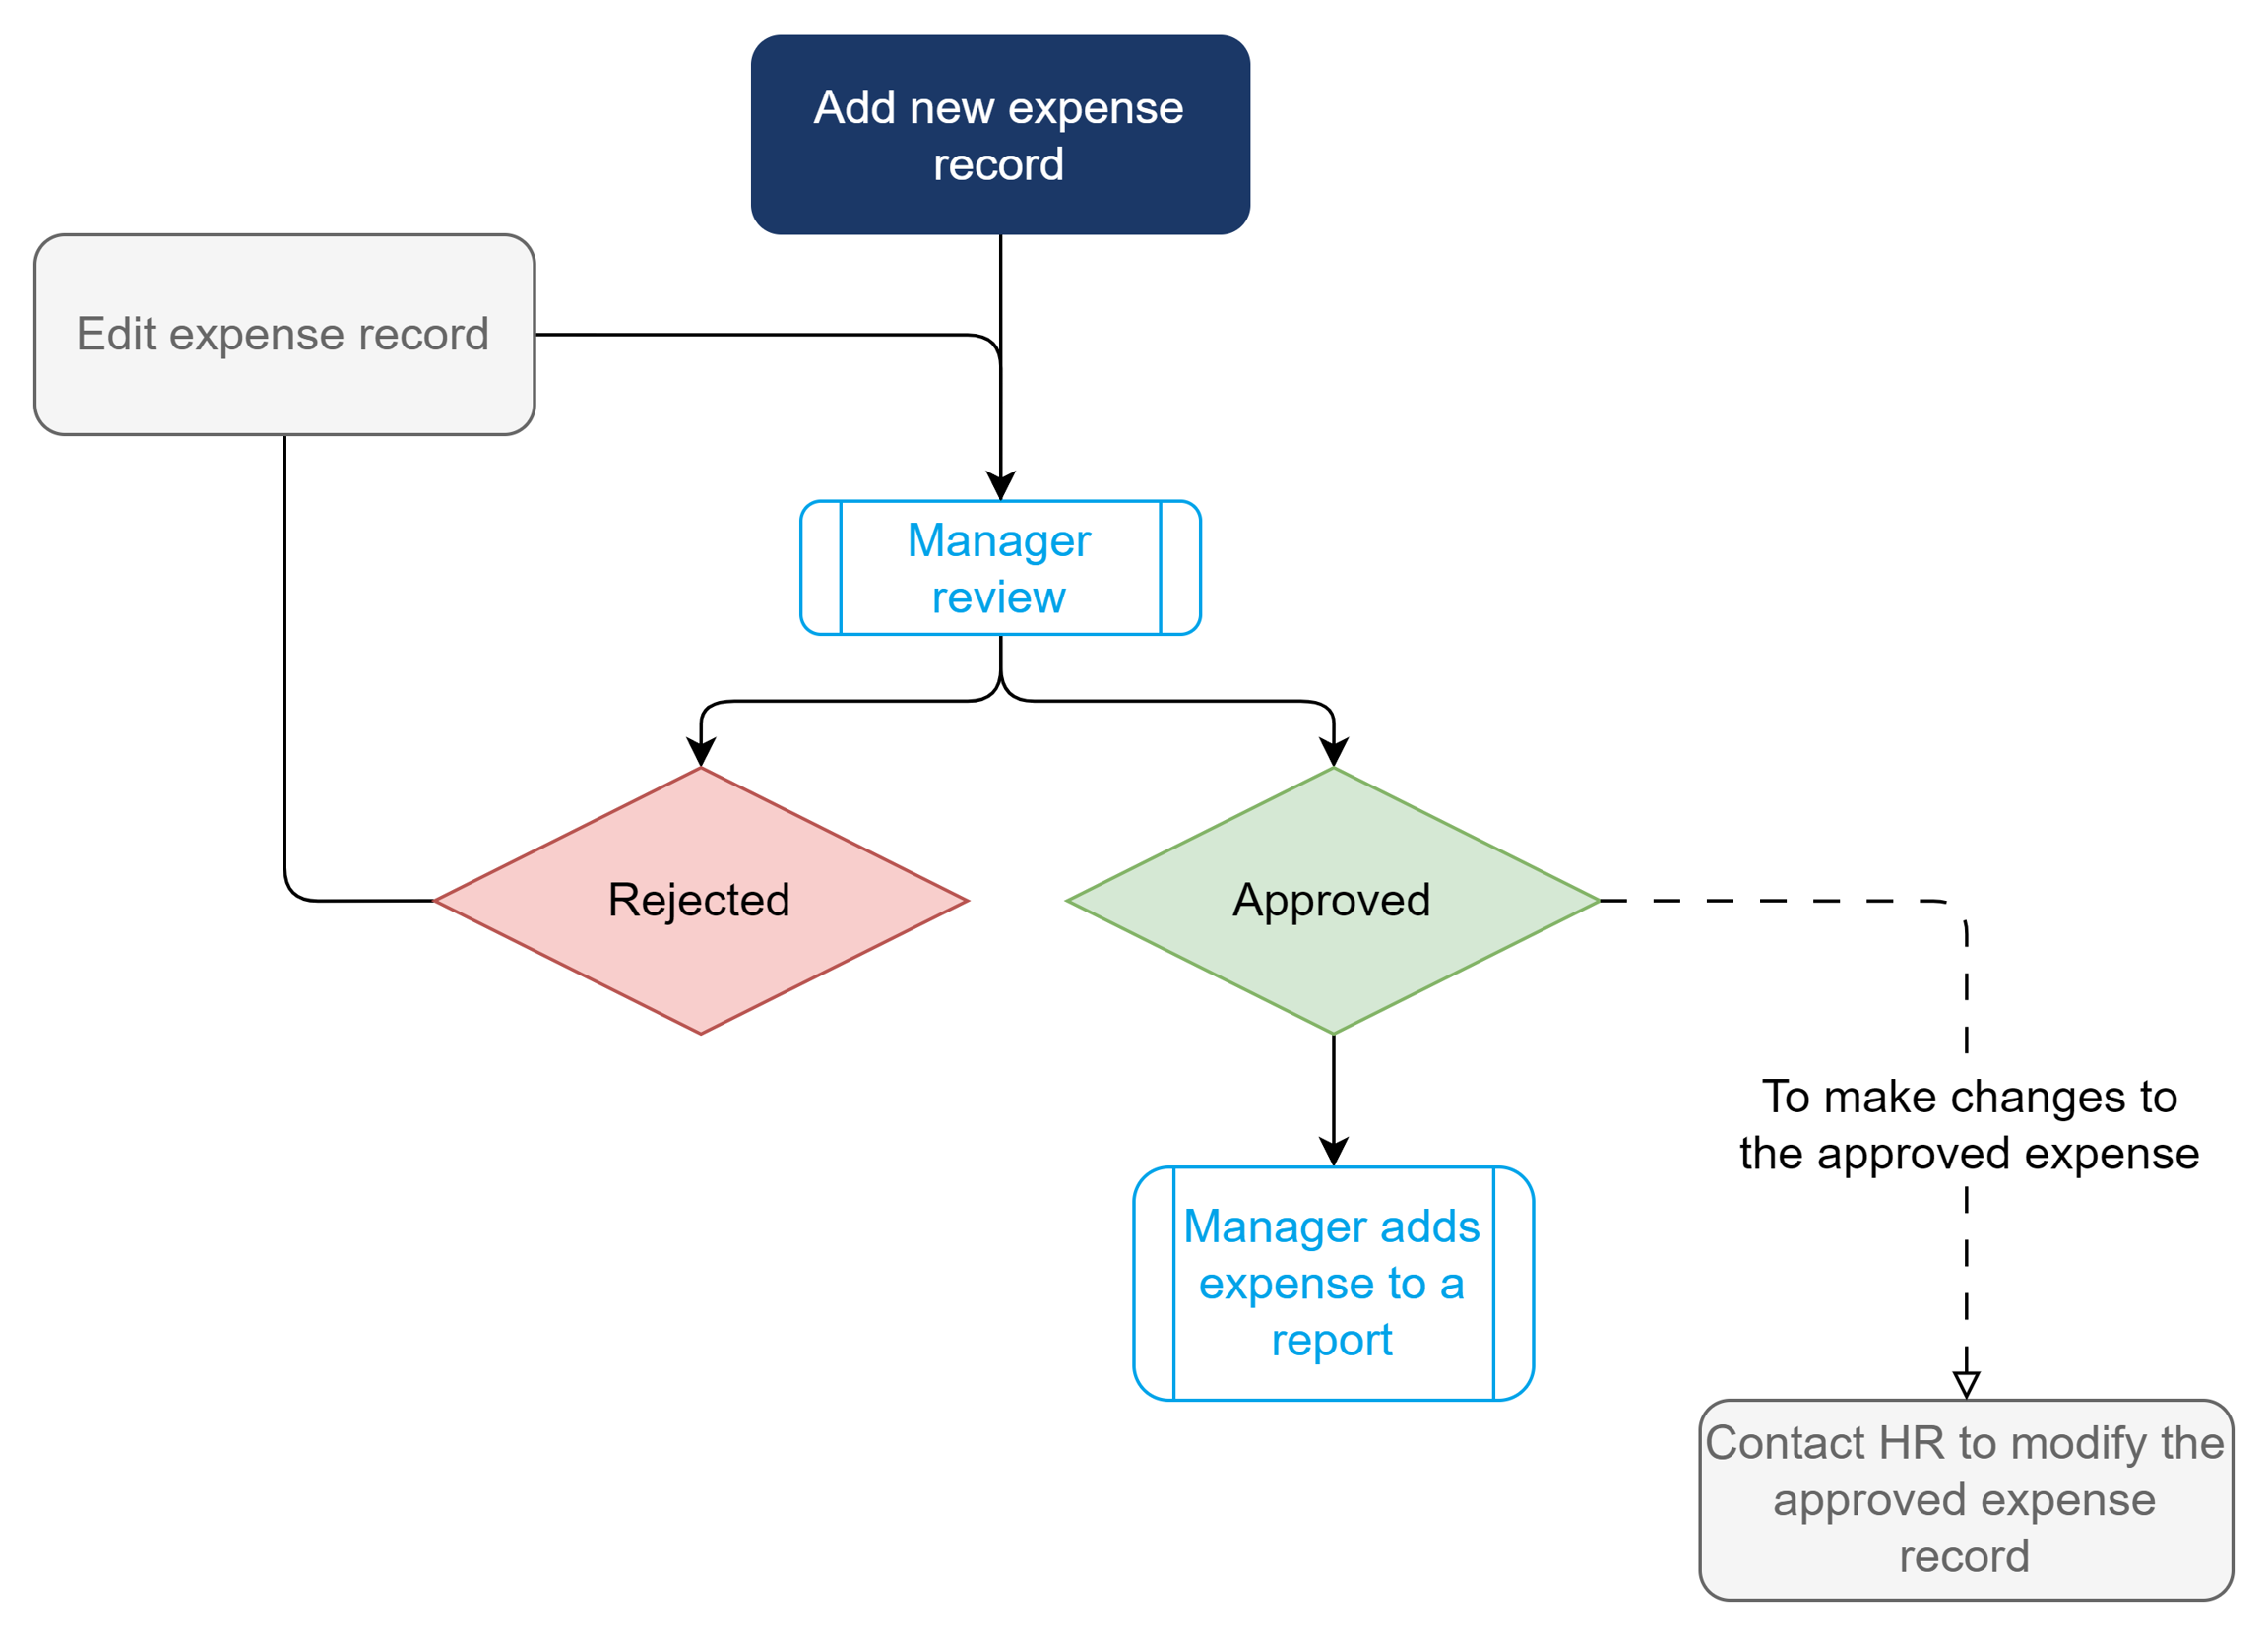
🔍 Expense Review Outcome

Once your expense has been reviewed, you will receive an email notification with the outcome.

You can also check the expense status in My Expense.

  • If your expense is rejected, you can select the expense to view the rejection notes and edit the expense for resubmission.

  • For more details on editing expenses, see Editing Expenses.


✅ Changes to Approved Expenses

Once an expense is approved, it cannot be edited or deleted.

If you need to make changes to an approved expense, contact your Reporting Manager, HR representative or vendor for assistance.


📝 Editing Expenses

You can edit unapproved expenses, including rejected expenses.

To edit an expense:

1

Go to My Expense

2

Under the expense, select ⋮ (three-dot icon) > Edit

3

The Edit Expense screen appears

4

Update the relevant fields

5

Select Submit

Your expense has been resubmitted for review, and the status of a rejected expense will update to Submitted.


🗑️ Deleting Expenses

You can only delete unapproved expenses.

⚠️ Note: Deleting an expense cannot be undone. However, all deleted expenses can be viewed in Deleted Items.

Last updated